ESS instructional YouTube Video and a Parts & Diagrams list
This Eberhart Outdoors video will walk you through and explain the parts of an ESS, putting it on and some tips while in a tree.
Below the video on this page is verbiage and diagrams to familiarize yourself with the parts of an ESS.
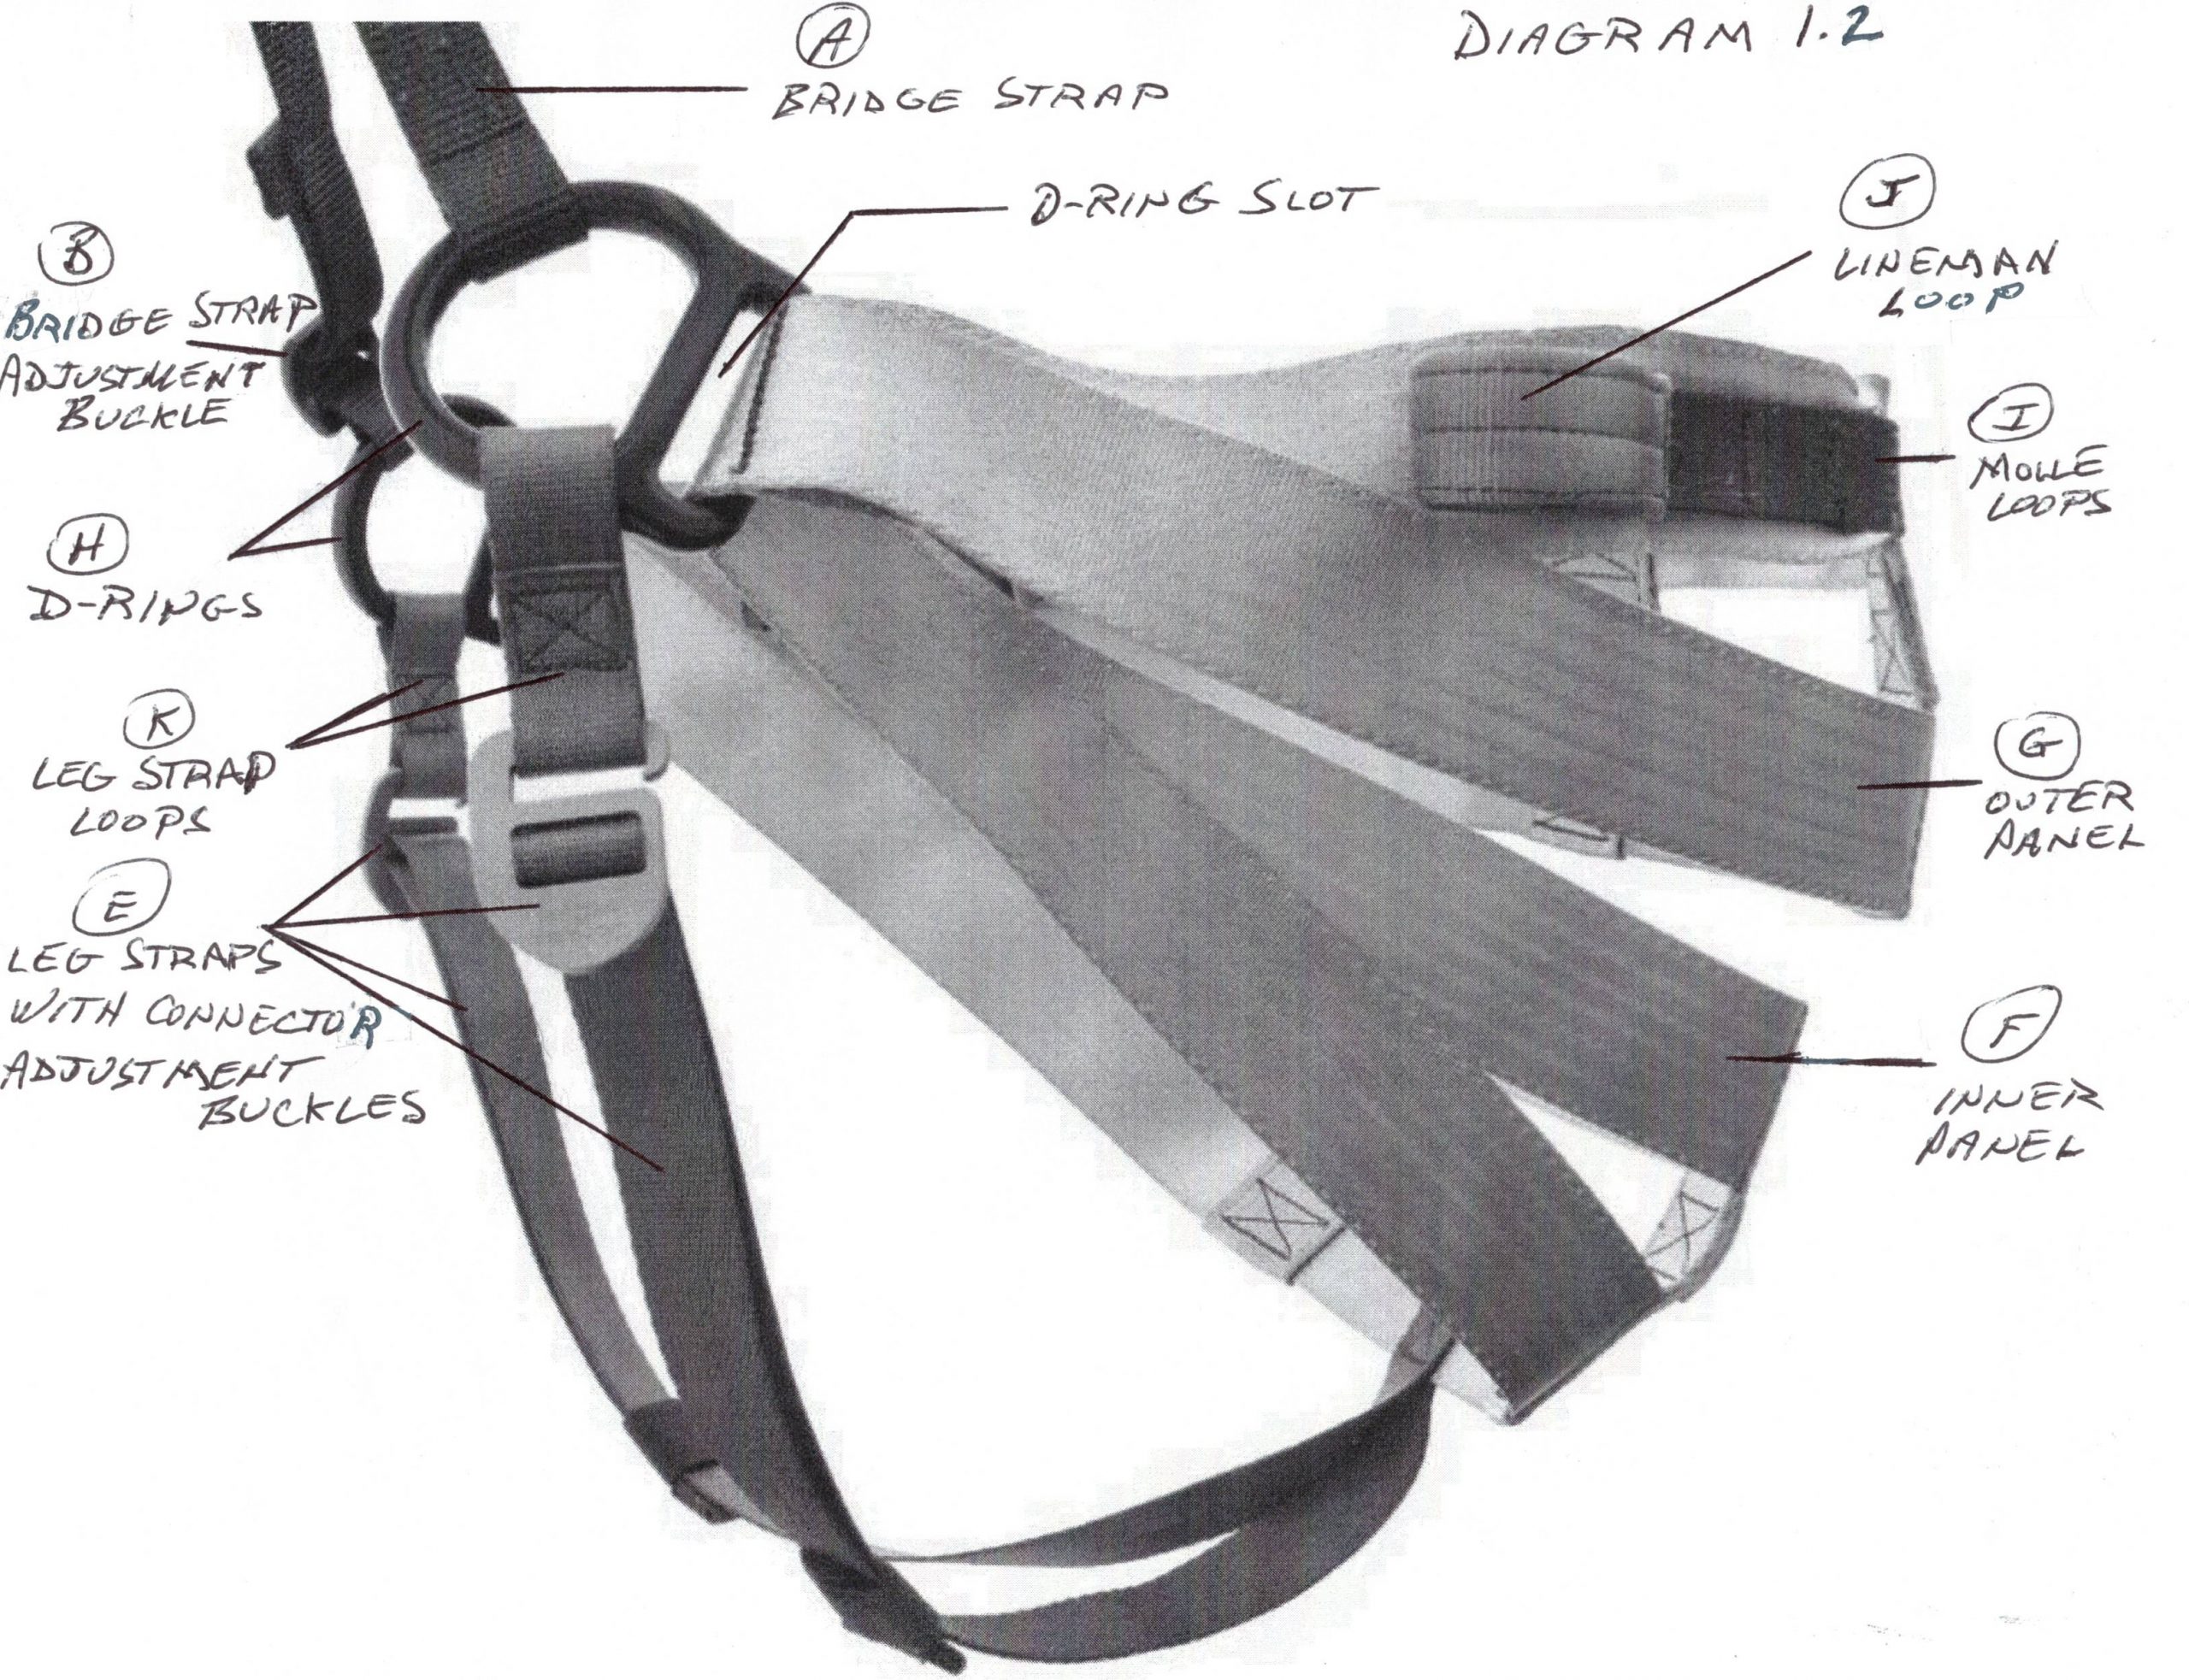
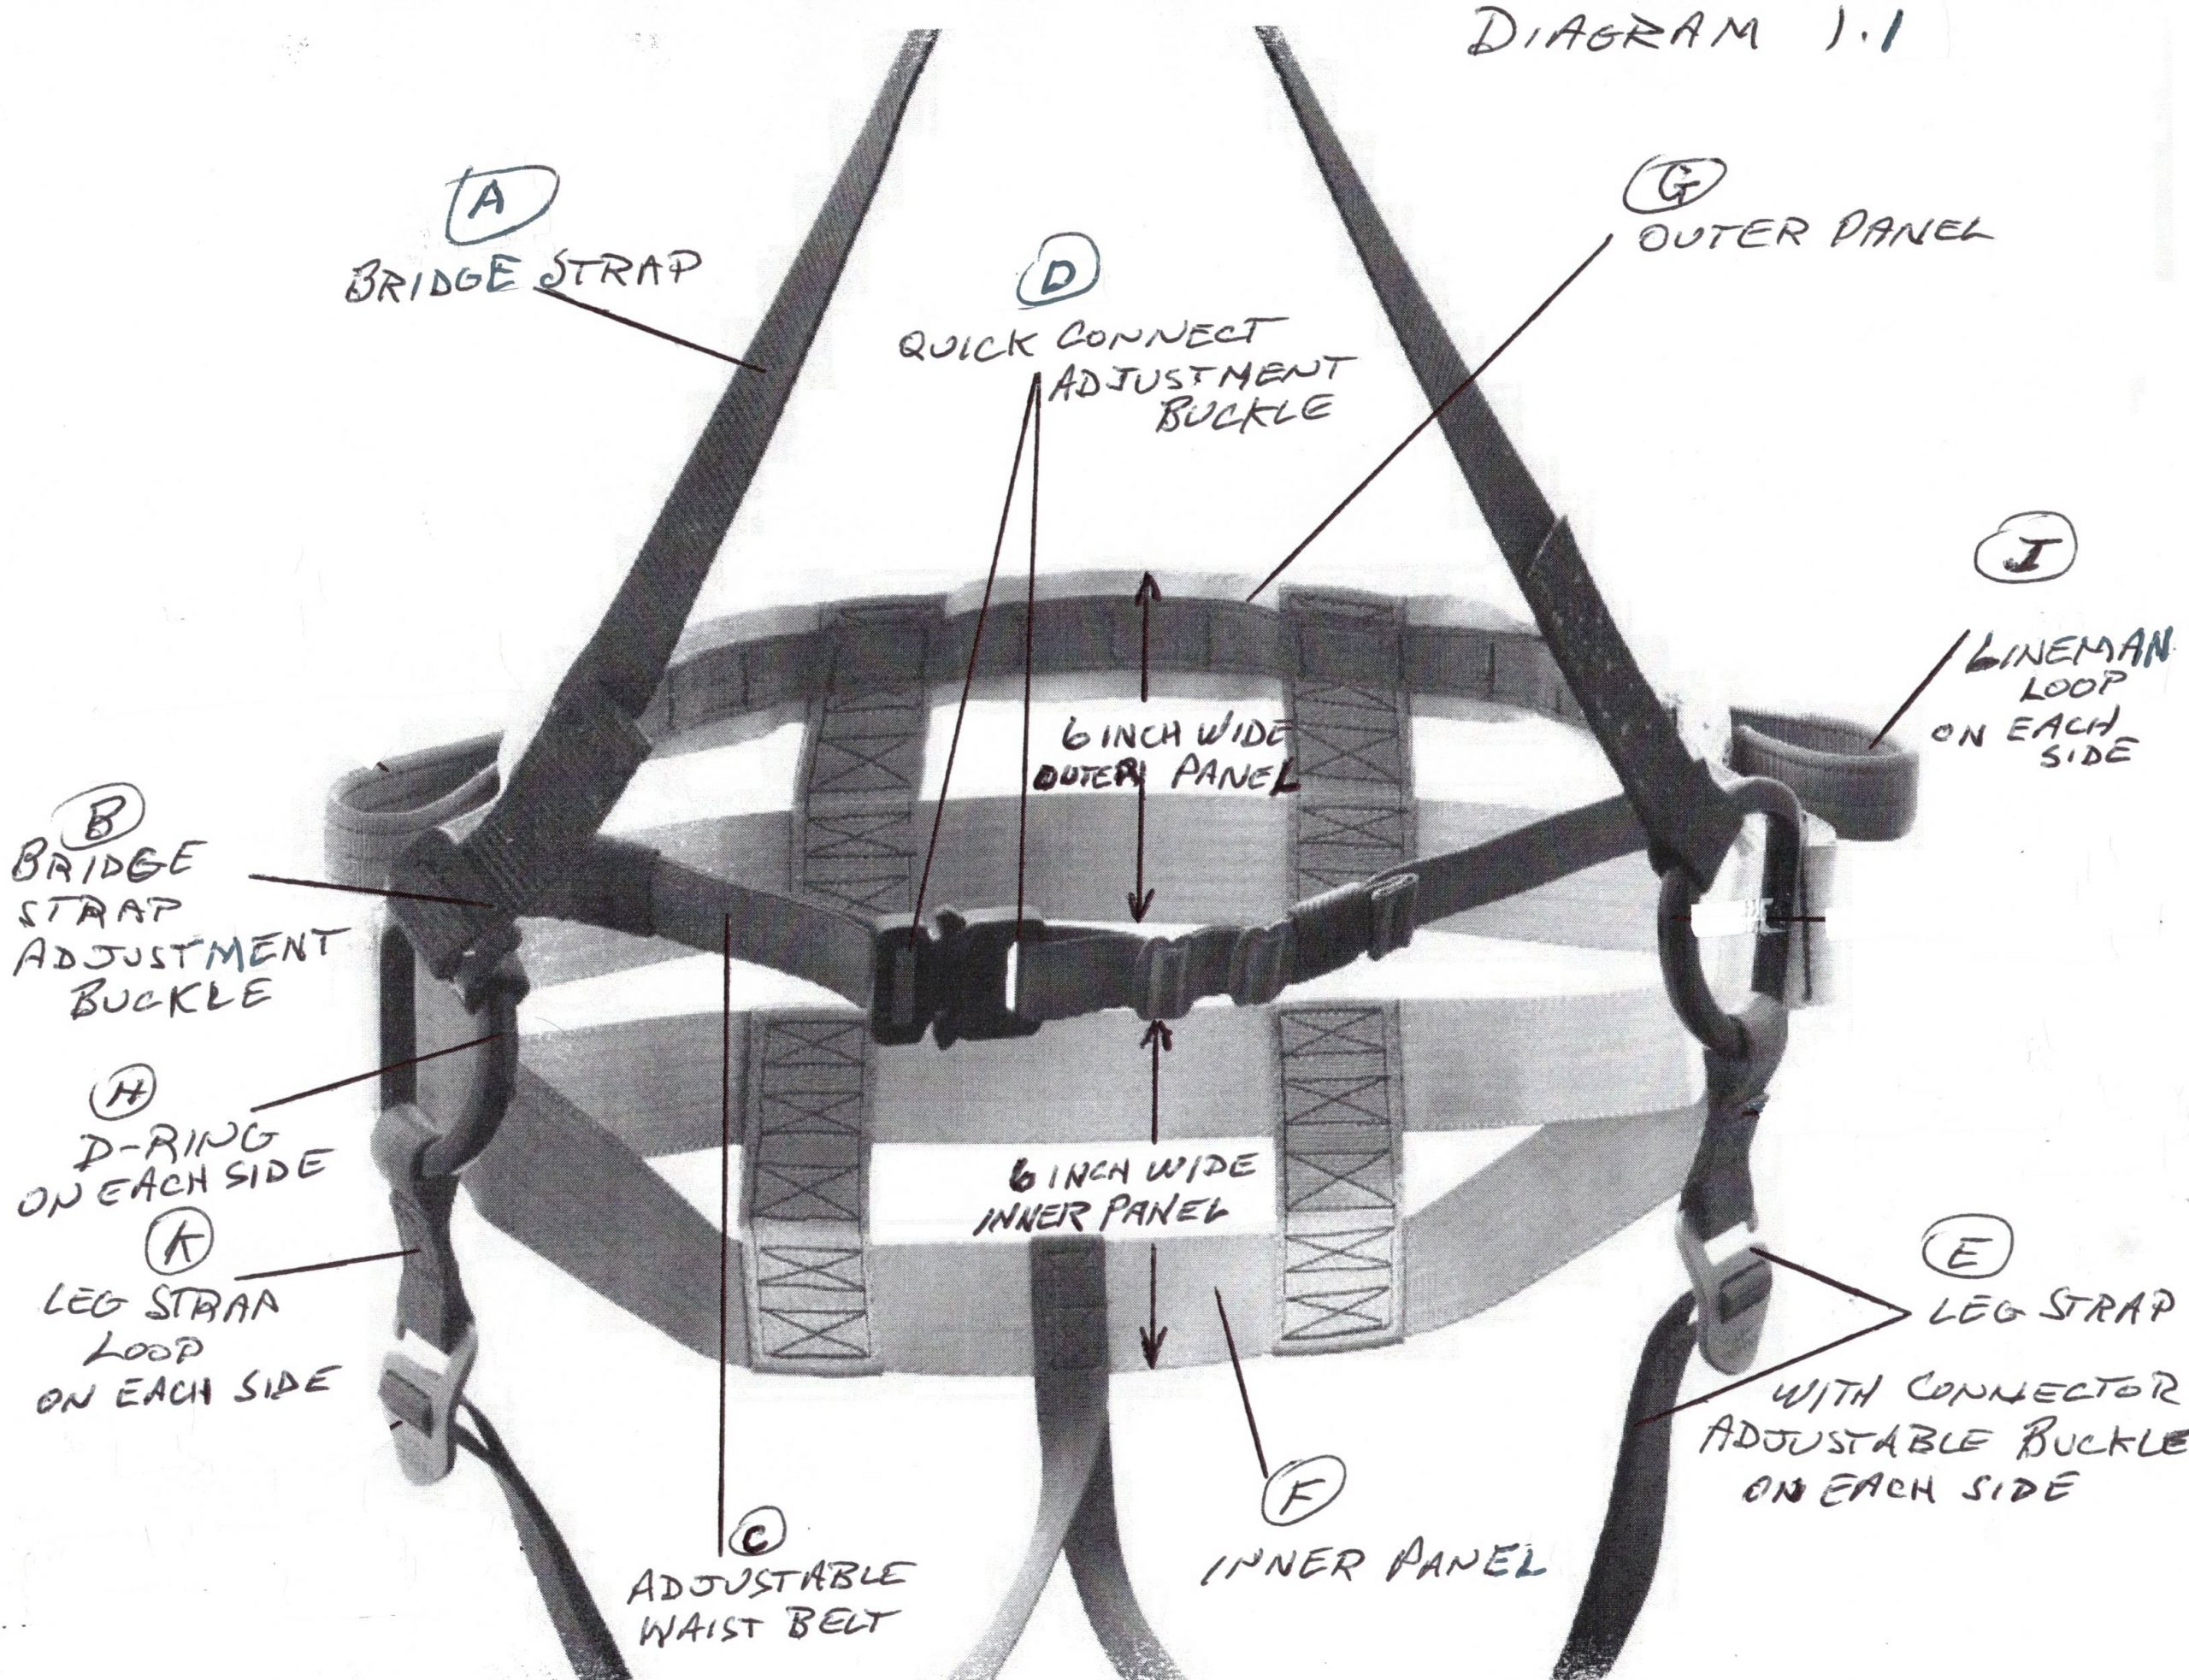
Before putting on your TETHRD® 2 panel Eberhart Signature Saddle (ESS) it is important to familiarize yourself with its parts and below are the written parts descriptions with letters and below the description verbiage are side and front view diagram pictures of an ESS showing the described parts.
-The bridge (A) is the long strap attached to the aluminum D-Rings and the strap has an adjustment buckle (B) on it for adjusting the length of the bridge strap. Diagrams 1.1 and 1.2
-The short leg strap loops (K) on the D-Rings are what the leg strap buckles (E) will slide in and connect to. Diagrams 1.1 and 1.2
-The adjustable waist belt (C) with its quick disconnect buckle (D) is attached around the inside top of the outer panel (G). Diagram 1.1
-The leg straps (E) are connected to the bottom of the inner panel (F) and they have adjustable buckles on them with open ended slots and those slots slip into the leg strap loops (K). Diagrams 1.1 and 1.2
-The D-Rings (H) are the smooth aluminum rings that the bridge strap (A), leg loops (K) and both panels of the saddle (F and G) are connected to. Diagrams 1.1 and 1.2
-There are 2 continuous, yet independently working 6-inch panels (F is the inner panel and G is the outer panel) that at their narrowest points run through the slots under the D-Rings (H). Diagram 1.1 and 1.2
-The outer panel (G) has the lineman loops (J) on the outside, molle loops (I) around the outside, and the adjustable waist belt (B) around the inside of it. Diagram 1.1 and 1.2
-The inner panel (F) has the leg straps (E) attached to it.